
Connectors introduction
Connectors are used to allow data exchange with external tools, such as CRM tools or ecommerce tools.
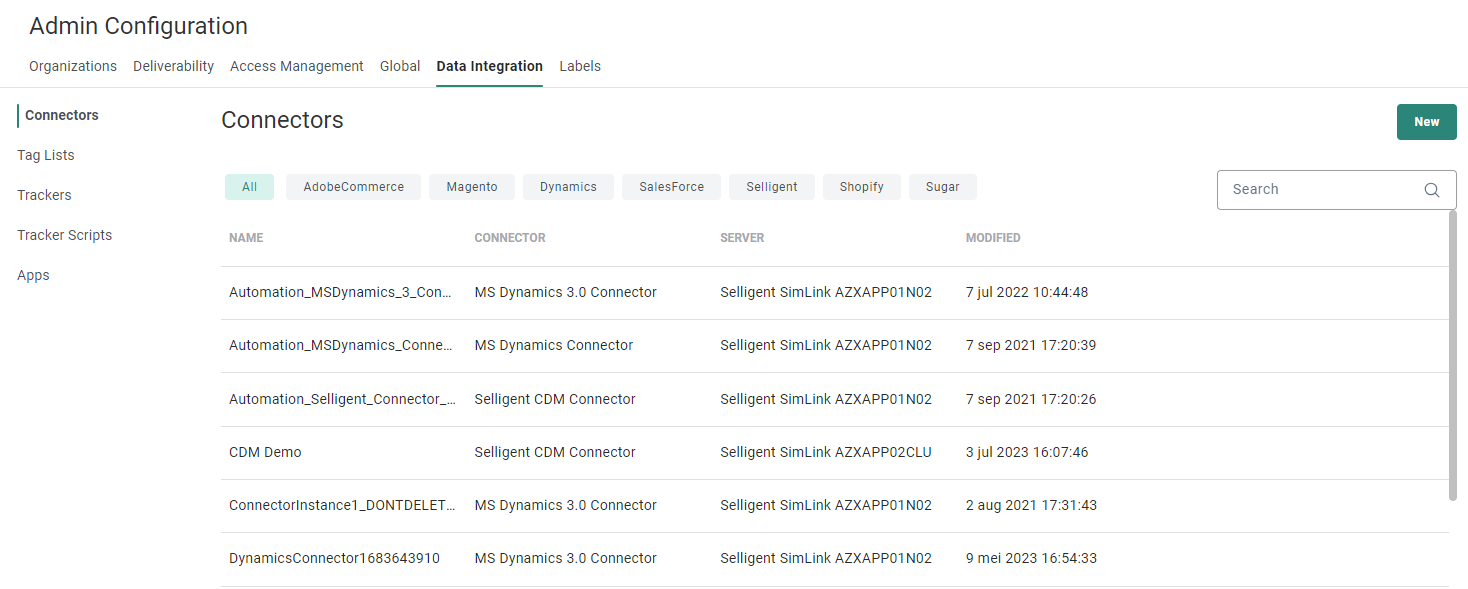
The Connectors overview shows all configured connector instances, in alphabetical order (by name).
Each row contains the connector instance name and connector type, the server it is installed on and the last modified date/time.
Also, at the right, icons are available to edit and delete the connector instance, or to see its usage.
The overview can be sorted by clicking on a column header.
The Search field at the top-right
allows searching in the list of connectors based on name.
From this overview you can
- Filter the list by type using the filter buttons at the top.
- Create a new connector instance — See below.
- Edit an existing connector instance — By clicking on a connector instance name. The properties are displayed in a right sliding panel. See below for more details.
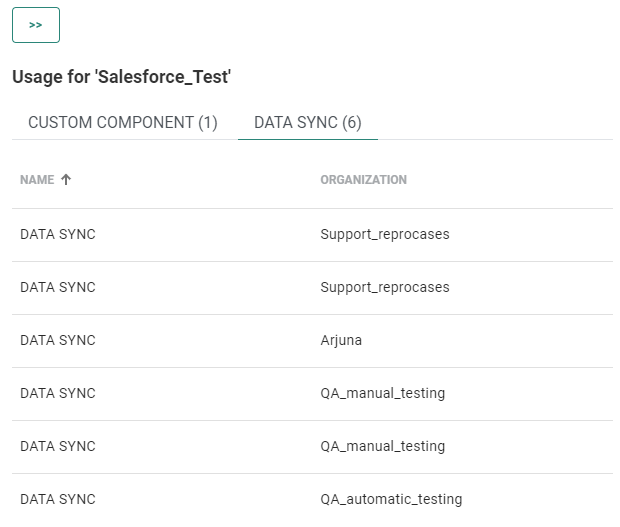
- View the usage of the connector instance — By clicking on the road sign. The usage is shown in the right sliding panel.
Usage is split per tab :
- Each tab corresponds to a different usage type( for example 'Data sync').
- The number of usages per type is shown between brackets (for example 'Data sync (20)').
You can click on a row to jump directly to a specific asset.
When a connector is used in an Business unit in Selligent by Zeta to which the user does not have access, this is mentioned explicitly
If a connector instance is not used at all, a message is shown.Example of a connector instance that is used in 1 custom component and 6 data syncs:
- Delete an existing connector instance — By clicking on the bin icon.
Note: A connector instance in use can not be deleted. In that case, the bin icon is disabled and shows a tooltip with explanation and the usage count when hovering over it.
Create a connector instance
A connector allows you to create an integration with an external tool, such as a CRM or ecommerce platform. Selligent supports connectors such as MS Dynamics, Salesforce CRM, SugarCRM and the CDM as well as Adobe Commerce, Shopify and Snowflake.
For a full list of all available custom and productized connectors, check out the devportal.
Not finding what you need in the list of productized connectors, check out the full list of all available prebuilt connectors in this overview.
Technical note: When a connector is created in Selligent, the definition is synced to Campaign and the option Data synchronization is by default selected. Messaging and Journey synchronization is disabled.
To create a new connector instance, click on New at the top-right.
The properties are then shown in a right sliding panel.
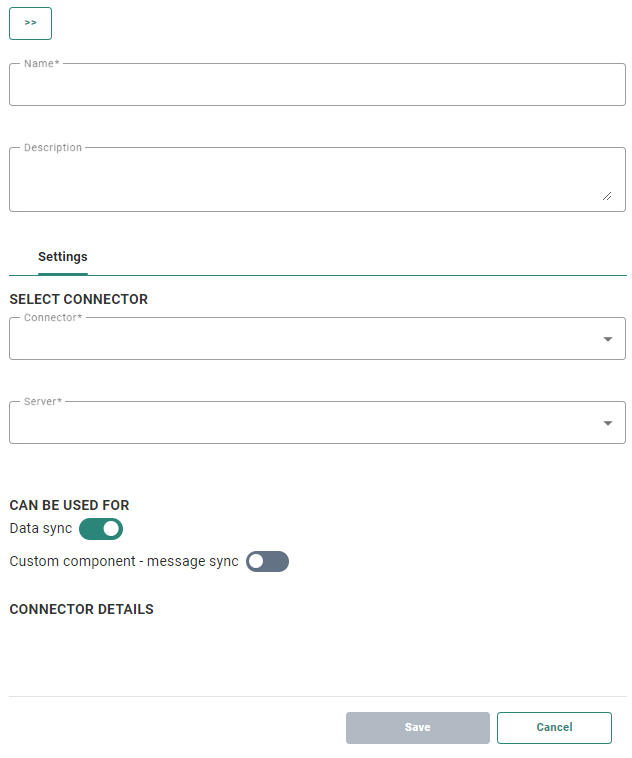
The following fields can be configured (the ones with an asterisk are required fields) :
- Name* — Enter a unique name for the connector instance.
- Description — You can provide a description for this connector instance.
Under Settings, by toggling the corresponding switch(es), you can define that the connector can be used for
- Data sync — by default enabled.
As long as the connector is not used in a data sync, this switch can be toggled on and off.
When used in a data sync, the switch can no longer be toggled. Instead a tooltip appears when hovering over the switch to inform that the connector is in use, and the mouse cursor changes to a 'forbidden' icon .
. - Custom component - message sync — by default disabled. This option is not available for the Adobe Commerce connector.
As long as the connector is not used in a custom component of type message sync, this switch can be toggled on and off.
When used in a custom component of type message sync, the switch can no longer be toggled. Instead a tooltip appears when hovering over the switch to inform that the connector is in use, and the mouse cursor changes to a forbidden icon.
Note: When you disable both Data Sync and Custom component - message sync, the save button becomes disabled and an error message appears under both options: Either Data Sync or Message Sync should be enabled for the connector instance.
Depending on the selected connector type, specific settings need to be filled out to create a connection between Selligent and the selected environment (see below in the section Define connector-specific settings).
When done, click Save to create the connector instance.
Note :
When saving a connector, your configured connection is checked. Inconsistencies (like wrong credentials, a server location that no longer exists, etc) result in errors to be shown. In that case, rectify your setup and save again.
Note: Connectors must be assigned to one or more Business units, in order to use them (within the Business unit(s)) !
Define connector-specific settings
SugarCRM
- Connector* — Select SugarCRM as type of connector from the drop-down list.
- Server* — This is the name of the server on which Selligent is installed. Select one from the drop-down list. Only servers on which the connector is installed are listed.
- URL* — This is the SugarCRM service URL used for the communication.
- UserID* — Your SugarCRM login.
- Password* — Your SugarCRM password.
You can find the complete admin guide for setting up this connector here.
MS Dynamics
- Connector* — Select MS Dyamics as type of connector from the drop-down list.
- Server* — This is the name of the server on which Selligent is installed. Select one from the drop-down list. Only servers on which the connector is installed are listed.
- URL* — This is the URL to the CRM server used for the communication.
- Business unit* — The Business unit name.
- UserID* — The username of the service account (eg. CRMAdmin@CRMSelligent.onmicrosoft.com)
- Password* — The password for the service account.
- Domain — The user domain (optional).
- CRM version* — Choose the type of CRM connector to use. You can choose from CRM4, CRM2011, Online, CRM2013, CRM2015, CRM2016, CRM365 and CRM365 XRM Tooling.
- Include unpublished changes* — You can choose between YES or NO. When data has not yet been published at MS Dynamics side, a sync will only include that data if this is set to 'Yes'.
- Application id — This custom application id is intended to be used for the CRM365 XRM Tooling version. It's optional and when not filled out the default application ID from MS Dynamics is used. However, to increase security it's possible to use a custom Application ID. These applications and IDs are created in MS Dynamics.
- Client Secret — You can use the Client Secret created in MSDynamics. Once it is filled out here and saved, the password field is ignored and Client Secret is used for authentication.
You can find the complete admin guide for setting up this connector here.
Salesforce
- Connector* — Select Salesforce connector as type of connector from the drop-down list.
- Server* — This is the name of the server on which Selligent is installed. Select one from the drop-down list. Only servers on which the connector is installed are listed.
- URL* — This is the Salesforce service used for the communication. Selligent uses the partner wsdl with the following endpoint: /services/Soap/u/xx.0 . Ensure the URL contains this information.
- Username* — The Salesforce login name.
- Password* — Your Salesforce password + token (This token is generated in Salesforce).
- Send null datetime values — A switch that can be toggled. When enabled, datetime fields with NULL values will sync the data as actual NULL values. When disabled, the default value is used instead (eg. "1700-01-01T00:00:00.000Z").
- Synchronize deleted items — A switch that can be toggled to enable/disable synchronization of deleted items for the Salesforce connector.
You can find the complete admin guide for setting up this connector here.
CDM
- Connector* — Select CDM connector as type of connector from the drop-down list.
- Server* — This is the name of the server on which Selligent is installed. Select one from the drop-down list. Only servers on which the connector is installed are listed.
- Login* — This is the CDM user $SI. The user exists by default in CDM.
- Password* — The password for your CDM user.
- SRM database name* — The physical name of the CDM database.
- SRM Webservices URL* — The URL where the CDM webservice is installed.
- Max retries count — The maximum number of times a retry to connect is done.
- Retry time gap — The time gap between two retries, expressed in seconds.
Adobe Commerce
Technical note: The connector supports Adobe Commerce v2 and above for Adobe Commerce Open Source (aka Adobe Commerce Community) and Adobe Commerce (aka Adobe Commerce Enterprise).
The connector uses Adobe Commerce REST API for data synchronization and the main prerequisite is to have the REST API endpoints accessible to the connector. The Adobe Commerce setup hence needs to open incoming/outgoing access for the port on which Adobe Commerce REST API is hosted. Both Adobe Commerce Open Source and Adobe Commerce Commerce distributions are bundled with REST API support by default.
- Connector* — Select Adobe Commerce connector as type of connector from the drop-down list.
- Server* — This is the name of the server on which Selligent is installed. Select one from the drop-down list. Only servers on which the connector is installed are listed.
- URL* — The URL of your Adobe Commerce instance.
- Consumer Key — The Consumer Key of the Adobe Commerce marketplace. This can be obtained from the Adobe commerce profile page.
- Consumer Secret — The Consumer Secret of the Adobe Commerce instance. This can be obtained from the Adobe commerce profile page.
- Access Token — The access token provided to the customer. This can be obtained from the Developer account, within the apps security settings.
- Access Secret — The access secret provided to the customer. This can be obtained from the Developer account, within the apps security settings.
Exposed Adobe Commerce data:
categories
categories-attributes
Coupons
credit-memos
customer-groups
customers
invoices
orders
orders-items
products
products-attribute-sets-groups
products-attribute-sets
products-attributes
products-attributes-types
products-links-types
products-options-types
products-types
sales-rules
shipments
stores-configs
stores-groups
stores
store-website
transactions
You can find the complete admin guide for setting up this connector here.
Shopify
- Name and Description — Provide a name and description for this connector.
- Connector* — Select Shopify connector as type of connector from the drop-down list.
- Server* — This is the name of the server on which Selligent is installed. Select one from the drop-down list. Only servers on which the connector is installed are listed.
- Name* — Shopify name.
- API Access token* — This token can be retrieved after the Shopify app has been created.
Exposed Shopify data:
Customers
Products
ProductVariants
Orders
OrderTransactions
You can find the complete admin guide for setting up this connector here.
Snowflake
- Connector* — Select Snowflake as type of connector from the drop-down list.
- Server* — This is the name of the server on which Selligent is installed. Select one from the drop-down list. Only servers on which the connector is installed are listed.
- Account — The Snowflake domain account
- Database —The Snowflake database used
- User — The Snowflake login.
- Private key — Your private key file from Snowflake
- Password of the private key
- Role — The Snowflake role used to take actions (required when working with a private key)
- Schema — The schema in the database
- Warehouse —The virtual warehouse used to run data processing and analytical queries
- Modified fields — Enter a list of ';' separated fields that are used to determine if a record has been updated or not. By default, the 'modified', 'modified_dt', 'updated', 'updated_dt', 'timespan' fields are used to determine if a record has been updated and requires a sync, but if this field is not available in the source, you can select one or more other fields.
You can find the complete admin guide for setting up this connector here.
Edit a connector instance
When editing a connector instance, the selected connector and server can not be changed.
You can only change the configuration details underneath (eg. url, userid, password).
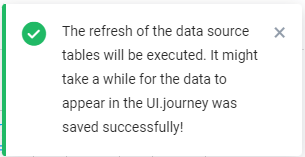
Refresh Data source tables
When editing a connector instance, a refresh button can be clicked at the top-right, to refresh the Data source tables.

A notification is then shown about the ongoing execution (this can take a while).
View incidents
When editing a connector instance, an additional incidents tab is available to view the incidents for that connector instance.
- In the status column, a red (= error) or orange (= warning) bullet is shown for each incident.
- Incidents are sorted in descending order by date.
- The incident message is shown, explaining the error or warning.
- You can hover over a message to see the entire message in a tooltip.
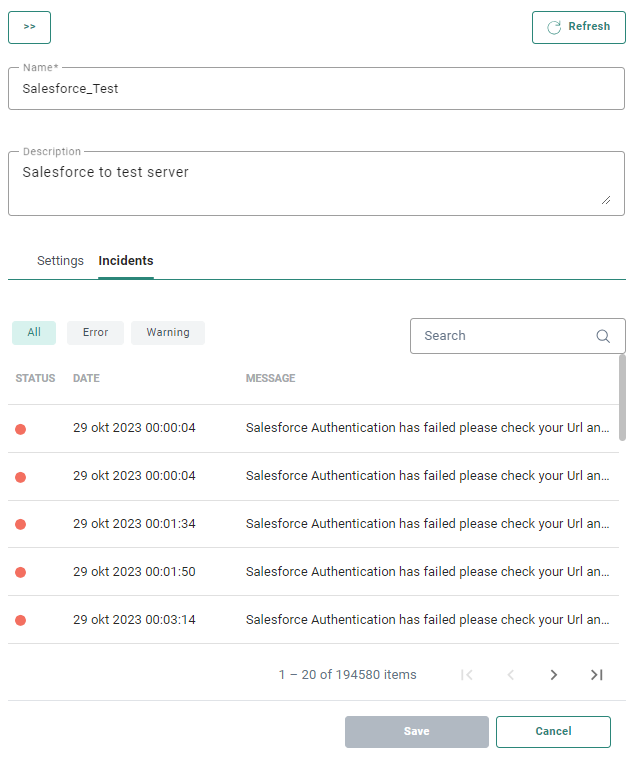
Twenty entries are shown per page. Navigation is possible via the page numbers and arrows on the bottom.

It is possible to filter the incidents by selecting All, Error or Warning.
You can also search for specific messages within the list of incidents.
